Landing Pattern Cessna 172: Visual Guide & Speeds
Dec 22, 2025
Mastering the landing pattern in a Cessna 172 is essential for safe, smooth landings and is a good starting point for pilots building consistent approach skills as they learn how to fly Cessna 172.
Whether you're a student pilot or seasoned flyer, understanding the precise speeds, power settings, and visual cues will boost your confidence and consistency. Dive into this comprehensive guide to perfect your Cessna 172 landing pattern today!
Quick Reference: Standard Cessna 172 Pattern (Answer First)
Here’s your cheat sheet for a normal day with calm winds, flying a standard pattern at 1,000 ft AGL with no obstacles. These numbers work well for a 172S or 172N, though you should always cross-check your specific POH.
Key Reference Numbers for the 172
-
Pattern altitude: 1,000 ft AGL
-
VY (best rate climb): ~74 KIAS
-
VSO (stall speed, landing configuration): ~40 KIAS
-
Typical final approach speed: 60–65 KIAS
Leg-by-Leg Quick Reference
-
Upwind: Climb at Vy, approximately 74 KIAS, tracking runway centerline extended
-
Crosswind leg: Continue climbing, aim to turn within 300 ft of TPA, maintain near-Vy speed
-
Downwind leg: Level at TPA, 80–90 KIAS clean, maintain 0.5–0.75 NM from runway
-
Abeam threshold: Reduce power to 1,500–1,600 RPM, add first flaps (10°), begin descent
-
Base leg: 65–70 KIAS, 20° flaps, approximately 1.3–1.4 × Vso
-
Final approach: 60–65 KIAS, 30° flaps (short-field 61 KIAS), approximately 1.3 × Vso
When you look out the window on downwind, the runway should appear about halfway up the wing strut from your seated position. This visual reference, combined with the window frame as a parallel guide, helps you maintain consistent spacing every circuit.
Think of this section as your dense reference card the numbers you’d jot on your kneeboard before pattern work.
Pattern Shape, Size, and Visual References
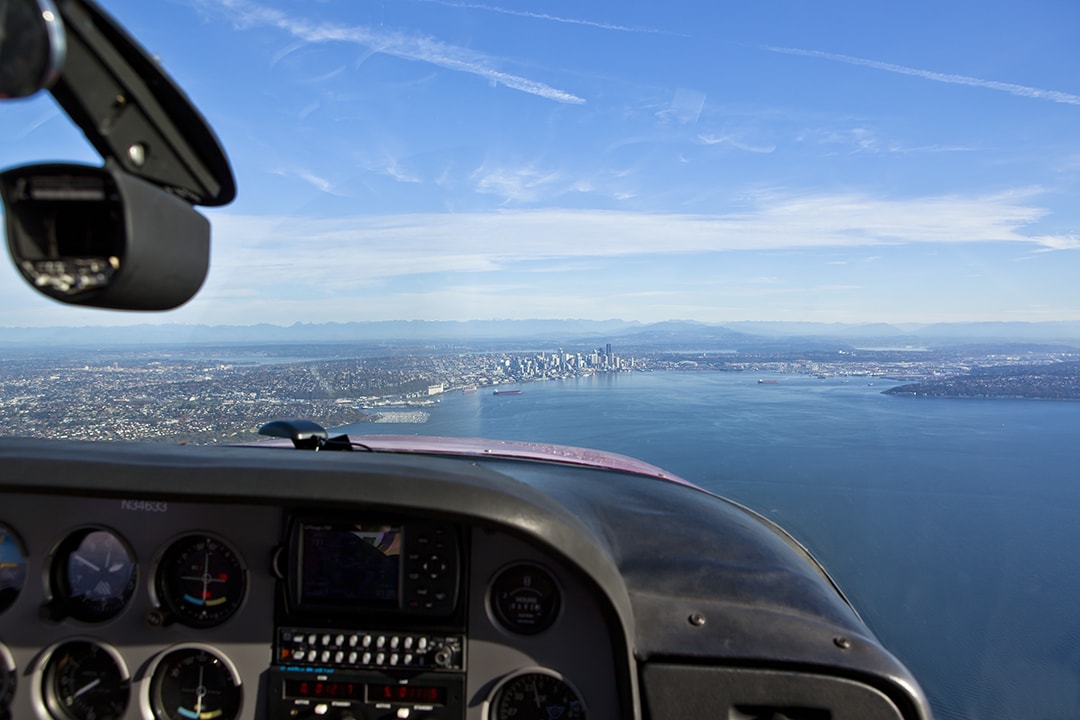
A standard rectangular pattern wraps around a single runway in calm winds, creating a consistent ground track that every pilot in the pattern can anticipate. The exact dimensions depend on your aircraft type and local procedures, but for a Cessna 172, certain spacing works reliably.
Ideal Downwind Spacing
-
Maintain roughly 0.5–0.75 NM from runway centerline on downwind
-
At 0.75 NM, common power settings work well for descent timing
-
Too close creates rushed, steep approaches; too wide creates shallow, draggy finals
Visual Cues for Consistent Spacing
-
The runway should appear about halfway up the wing strut from your seated eye position
-
Use the lower edge of the side window as a parallel reference the runway should track along it
-
Cross-check using GPS “distance to airport” when abeam the threshold
-
Note specific ground references (roads, rivers, taxiways) that mark your ideal track
Why Spacing Matters
An overly wide pattern creates a long, shallow final where you’re fighting drag and burning fuel while barely descending. If the engine quits on a wide downwind, you may not glide back to the field. A pattern that’s too tight leads to steep base-to-final turns, overshoots, and rushed configurations.
Ask your flight instructor to point out ground reference points at your home airport that mark the ideal downwind track. A road running parallel to the runway, a line of hangars, or a river bend can become your personal aiming line every circuit.
Cessna 172 Power Settings and Pattern Speeds
Exact RPM varies by your specific aircraft, prop condition, weight, and density altitude. However, these starting points work well for most training scenarios in a 172S with a fixed-pitch prop. Your instructor taught you specific numbers use those as your baseline, but understand the logic behind them.
Typical Power and Speed Settings
|
Leg |
RPM |
Airspeed |
Flap Settings |
|---|---|---|---|
|
Downwind (level at TPA) |
2,000–2,200 |
80–90 KIAS |
0° |
|
Abeam threshold |
1,500–1,600 |
~70 KIAS (descending) |
10° |
|
Base leg |
1,400–1,500 |
65–70 KIAS |
20° |
|
Final approach |
1,300–1,500 |
60–65 KIAS |
30° |
The Speed Priority Rule
Speed control takes priority over chasing a specific RPM number. If you’re slow, add more power regardless of what your “target” RPM says. If you’re fast, reduce power even if that drops you below the cookbook setting. Practicing these adjustments with a Cessna Throttle helps reinforce proper power management by building realistic muscle memory instead of fixating on numbers.
After every configuration or power change, adjust your trim. This removes control pressure and lets you fly the airplane rather than wrestling it. Many students make the mistake of fighting the yoke instead of trimming, which leads to fatigue and inconsistent patterns.
FAA Guidance vs. Real-World Training
-
FAA generically recommends 1.4 × VSO on base and 1.3 × VSO on final
-
For a 172S with VSO around 40 KIAS, that calculates to 56 KIAS on base and 52 KIAS on final
-
Most instructors use slightly higher speeds (70 KIAS base, 60–65 final) for stability and go-around margin
Leg-by-Leg: Flying the Landing Pattern in a Cessna 172
This section walks you from takeoff to touchdown, focusing on a normal, calm-wind landing at a non-towered airport. Each leg has specific visual cues, altitudes, and speeds. Connect what you see on the instruments with what you see outside that combination builds the sight picture that makes pattern work feel natural.
Upwind and Takeoff in the 172
The upwind leg begins at brake release and continues until you turn crosswind. This phase establishes your climb and sets up the rest of the pattern.
Upwind Procedure
-
Hold centerline during takeoff roll with rudder, correcting for any crosswind
-
Rotate around 55 KIAS in a 172S, allowing the aircraft to fly off
-
Establish climb at approximately 74 KIAS (Vy) with positive rate
-
Track the extended runway centerline by picking a distant point ahead this keeps you straight even with the nose high
When to Turn
-
Continue climbing straight ahead until at least 300 ft AGL
-
Most pilots wait until 500 ft AGL before any turn unless noise abatement or tower instructions specify otherwise
-
At towered airports, expect specific instructions; at non-towered fields, use standard procedures
Crosswind Correction
Even on upwind, wind affects your ground track. Apply aileron into the wind to prevent drift, using rudder to maintain coordinated flight and keep the nose aligned with your extended centerline.
Crosswind Leg
The crosswind leg turns you perpendicular to the runway as you continue climbing toward pattern altitude.
Crosswind Turn Timing
-
Typically turn crosswind at 500–700 ft AGL
-
Never turn before the departure end of the runway unless explicitly cleared or noise abatement requires it
-
At some airports, you may extend upwind further to allow other traffic to depart
Flying the Crosswind Leg
-
Roll into a shallow to medium bank (20–25° maximum for students)
-
Establish a track perpendicular to the runway
-
Continue climbing toward traffic pattern altitude, maintaining near-Vy speed or slightly faster for better visibility and engine cooling
-
Scan aggressively for other traffic, especially aircraft already on downwind or base
Visual Picture
As you turn, watch the runway slide toward your side window. The horizon should show your climb pitch attitude nose above the horizon, but not excessively. If you’re assuming a normal 1,000 ft AGL pattern, you should reach altitude just before or as you turn onto downwind.
Downwind Leg
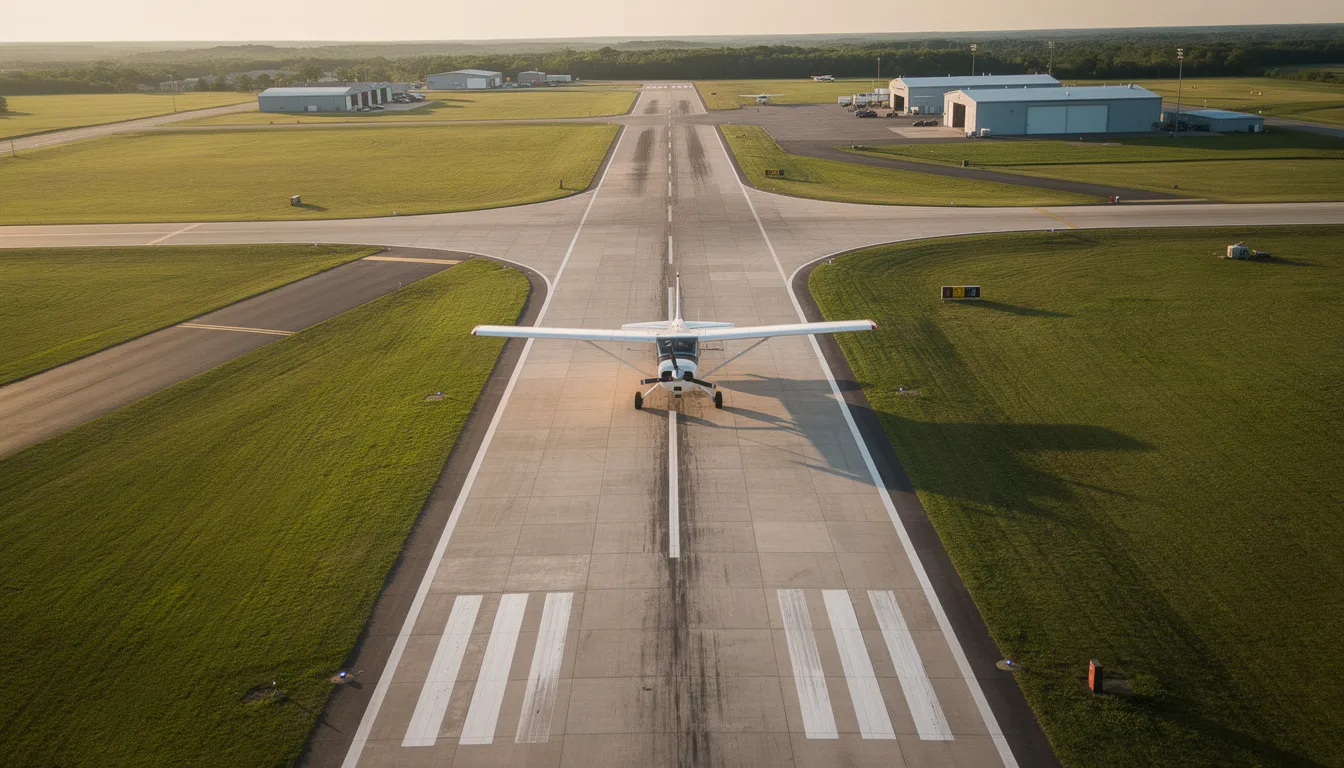
The downwind leg is where you configure the aircraft for descent and make your critical spacing judgments.
Leveling Off
-
Begin leveling just before or as you turn onto downwind
-
Reduce power to approximately 2,000–2,200 RPM to avoid accelerating beyond 90 KIAS
-
The exact RPM depends on your aircraft and conditions
Maintaining Position
-
Use the wing strut or side window frame to keep the runway parallel at consistent distance
-
Target 0.5–0.75 NM from the runway the runway should appear halfway up the strut
-
Maintain 80–90 KIAS with flaps up
-
Trim the aircraft so releasing pressure on the yoke holds altitude and speed
Downwind Checklist Items
-
Make radio call at non-towered fields: “Cessna 12345, left downwind runway 27”
-
Check carb heat procedures if equipped and conditions warrant
-
Verify engine instruments are normal
-
Set mixture rich (if at altitude where leaning was used)
This is your phase to stabilize before the descent. Don’t rush it. A sloppy downwind creates a sloppy approach.
Abeam the Numbers: Start of Descent
The descent typically begins when you’re abeam the intended landing point—usually the runway threshold or the aiming point markings.
Descent Initiation Checklist
-
Carb heat on (if used in your aircraft)
-
Reduce power to approximately 1,500–1,600 RPM
-
Add first notch of flaps (10°) once below Vfe
-
Allow the nose to drop slightly, targeting around 70 KIAS initially
-
Adjust pitch to maintain stable airspeed, then reset trim to remove control pressure
What You Should See
The runway threshold should begin to drop slowly in the side window as your descent starts. If the threshold appears to climb in your view, your descent is too shallow you need to reduce power further or accept a steeper pitch attitude.
This is a transition point. Get the power reduction, flap extension, and trim adjustment done promptly so you’re not chasing the approach later.
Base Leg
The base turn sets up your final approach alignment. Getting this turn wrong creates problems that compound all the way to touchdown.
When to Turn Base
-
The touchdown point should be approximately 45° behind your wing
-
For a 1,000 ft AGL pattern, you’ve typically descended to 800–900 ft MSL above field elevation
-
If you extend downwind too long, you’ll end up on a long, flat final; too short creates a steep, rushed approach
Base Leg Configuration
-
Roll into a moderate bank, tracking perpendicular to the runway
-
Add second notch of flaps (20°) on or shortly after rolling out on base
-
Adjust power to approximately 1,400–1,500 RPM
-
Trim for 65–70 KIAS
Assessing Your Position:
|
Situation |
Visual Cue |
Correction |
|---|---|---|
|
High |
Runway threshold low in windscreen |
Add flaps, reduce power slightly, or delay final turn |
|
Low |
Threshold rising, steeper than normal |
Reduce flap extension, add power, or accept shallower approach |
|
On glidepath |
Stable aim point position |
Maintain configuration |
Watch the runway move toward your front quarter window. Avoid steep, rushed turns if you’re turning base too late, accept the longer final rather than cranking into a 45° bank.
Final Approach and Flare
Final approach is where everything comes together. A stabilized final means consistent speed, controlled descent, and aligned with centerline. If any of these are wrong below 500 ft AGL, go around.
Turning Final
-
Use a shallow, coordinated bank to intercept the extended centerline
-
Adjust for crosswind drift as needed crab initially, then transition to wing-low for touchdown
-
Never exceed about 30° bank on final
Final Approach Speed and Configuration
-
Normal landing: 60–65 KIAS with 30° flaps
-
Short-field: approximately 61 KIAS per POH with full flaps
-
Power adjusted to control descent rate aim for 300–500 fpm descent
Aim Point Technique
Pick a stable aim point (commonly the 1,000 ft markers or a point 100–200 ft before your desired touchdown zone). Keep that point stationary in the windshield. Use power to correct high or low; use pitch to fine-tune airspeed. If the aim point moves up in your windscreen, you’re going to land short add power. If it moves down, you’re going long reduce power.
The Flare
As the runway expands in the windscreen (around 10–20 ft above the surface), gradually raise the nose. Your eyes should shift from the aim point to the far end of the runway, using peripheral vision to judge height. Ground effect will cushion the descent at 5–8 ft above the surface.
Continue increasing back pressure progressively until the main wheels touch in a nose-high attitude, ideally at minimum flying speed. Then lower the nosewheel gently and maintain back pressure to keep weight off the nose gear during rollout.
Pattern Speeds vs FAA and Manufacturer Guidance
There’s often confusion between FAA-recommended speed formulas, POH-published numbers, and the “school speeds” that instructors teach. Understanding where each comes from helps you make better decisions.
FAA Generic Recommendations
-
1.3 × Vso on short final
-
1.4 × Vso on base and during approach
For a 172S with Vso approximately 40 KIAS, the math yields:
-
1.3 × 40 = 52 KIAS on short final
-
1.4 × 40 = 56 KIAS on base
What the POH Actually Says
-
Cessna 172S POH suggests 61 KIAS for short-field final with 30° flaps
-
This is notably higher than the bare 1.3 × Vso calculation
-
The manufacturer builds in margin for gusty conditions and varying weights
What Instructors Actually Teach
Many instructors use even higher pattern speeds in training:
-
70 KIAS on base
-
60–65 KIAS on final
This provides better stability, more margin above stall, and easier integration with faster traffic. The idea is to fly conservatively during training and refine toward minimum speeds as proficiency increases.
Comparison with Faster Aircraft
A Cirrus SR22T typically flies 100 KIAS downwind, 90 KIAS base, and 80–85 KIAS final. These numbers also roughly correspond to 1.3–1.4 × Vso for that aircraft. The formula scales, but exact application depends on aircraft characteristics.
Bottom Line
Start with your POH. Use school “cheat sheet” speeds as a training aid, not a substitute for published data. As you gain proficiency, you’ll understand when to fly the minimum numbers and when a slightly faster approach makes sense.
Adapting the Pattern to Real-World Conditions
The textbook 1,000 ft AGL, calm-wind, left-hand pattern rarely happens exactly in real life. Traffic, weather, terrain, and ATC instructions constantly modify your plan. Skilled pattern flying means adapting the framework while maintaining safety margins.
Common Real-World Scenarios
-
Busy towered airports: Expect to extend downwind, fly S-turns, execute 360s for spacing, or adjust speed per ATC
-
Non-towered fields: Self-sequence behind slower or faster aircraft, adjusting your pattern to maintain separation
-
Different pattern altitudes: 600, 800, or 1,500 ft AGL patterns require earlier or later descents and modified power management
Pilot Authority
Never accept instructions beyond your comfort or proficiency. “Unable” is an acceptable response to ATC. If a controller asks you to maintain 120 knots to the numbers and your aircraft can’t do that safely, say so.
Adapting to Pattern Altitude
-
Lower pattern altitudes (600–800 ft): Delay flaps and descent initiation, use slightly higher power to avoid descending too steeply, tighten your base turn timing
-
Higher pattern altitudes (1,500 ft): Start descent earlier or widen the pattern slightly, allow more time for configuration changes
Stay flexible, but never sacrifice the stabilized approach criteria. If the approach isn’t working, go around and try again.
Handling Other Traffic and Tower Instructions
At towered airports, ATC manages traffic flow using standard phraseology. Knowing what each instruction means helps you respond correctly and maintain awareness.
Common ATC Instructions
|
Phrase |
Meaning |
Your Response |
|---|---|---|
|
“Extend upwind” |
Continue straight ahead longer before turning crosswind |
Maintain climb, watch for conflicting traffic |
|
“Extend downwind, I’ll call your base” |
Fly past your normal base turn point |
Maintain altitude and pattern speed, await base clearance |
|
“Make a right 360 for spacing” |
Complete a full circle to create separation |
Execute standard rate turn, maintain altitude |
|
“Follow traffic on 2-mile final” |
Sequence behind preceding aircraft |
Acquire traffic visually, adjust speed as needed |
Extending Downwind Safely
-
Maintain altitude and pattern speed (80–90 KIAS)
-
Keep the aircraft ahead in sight if following traffic
-
Delay the base turn until cleared (towered) or until spacing looks right (non-towered)
-
Watch your distance from the airport an extremely long downwind may put you outside comfortable gliding distance
Mixing with Faster Traffic
If traffic density requires, fly the upper end of acceptable pattern speeds: 90 KIAS downwind, 80 KIAS base, 70 KIAS on final until short final. Don’t slow below recommended final approach speed just to fit behind slower traffic.
Instead, use longer final segments or request a 360 at higher altitude if needed.
